Intro to Web Development
Welcome!
Let's get to know each other.
- A bit about myself
- Introduce yourself. Share what you hope to learn in this class.
A few guidelines:
- We are here for you!
- Every question is important
- Help each other
- Have fun 🎈
A few safety tips...
Never save your password on a shared computer.
Closing a tab does not sign you out of a website.
About this class
- Discover how websites are created
- HTML fundamentals
- CSS fundamentals
- Create and publish a website
Slides are available at: http://bit.ly/2G6TClz
Today
- Brief history of the Web
- What happens when we request a website
- Anatomy of a Website
- Write some HTML!
History of the Internet
- 1957 - First satellite in space
- 1958 - ARPA (Advanced Research Projects Agency) is formed
-
1969
- ARPAnet sends the first computer-to-computer message
- "LOGIN"
- 1991 - Tim Berners-Lee creates the World Wide Web
The Web's First Website
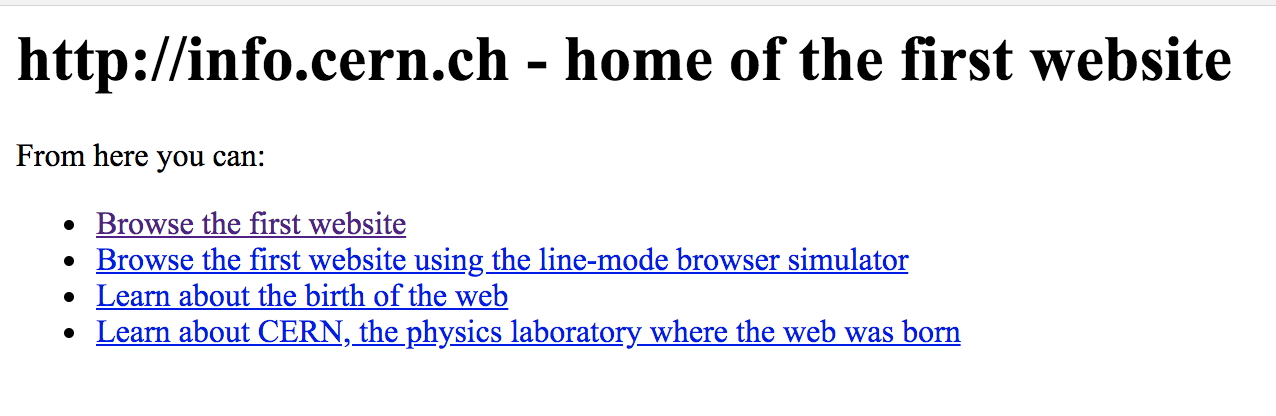
You can visit this site at: info.cern.ch
Browsers

Requesting a website
To request a website, we use the brower's Address Bar.

Requesting a Website
Let's act out requesting a website.
Actors Needed:
- Browser
- Internet Service Provider
- Domain Name System
- Router
Requesting a website
Browser -> ISP -> Router -> Google
Google -> Router -> ISP -> Browser
Building a Website
The browser expects to receive two important files, an HTML file and a CSS file.
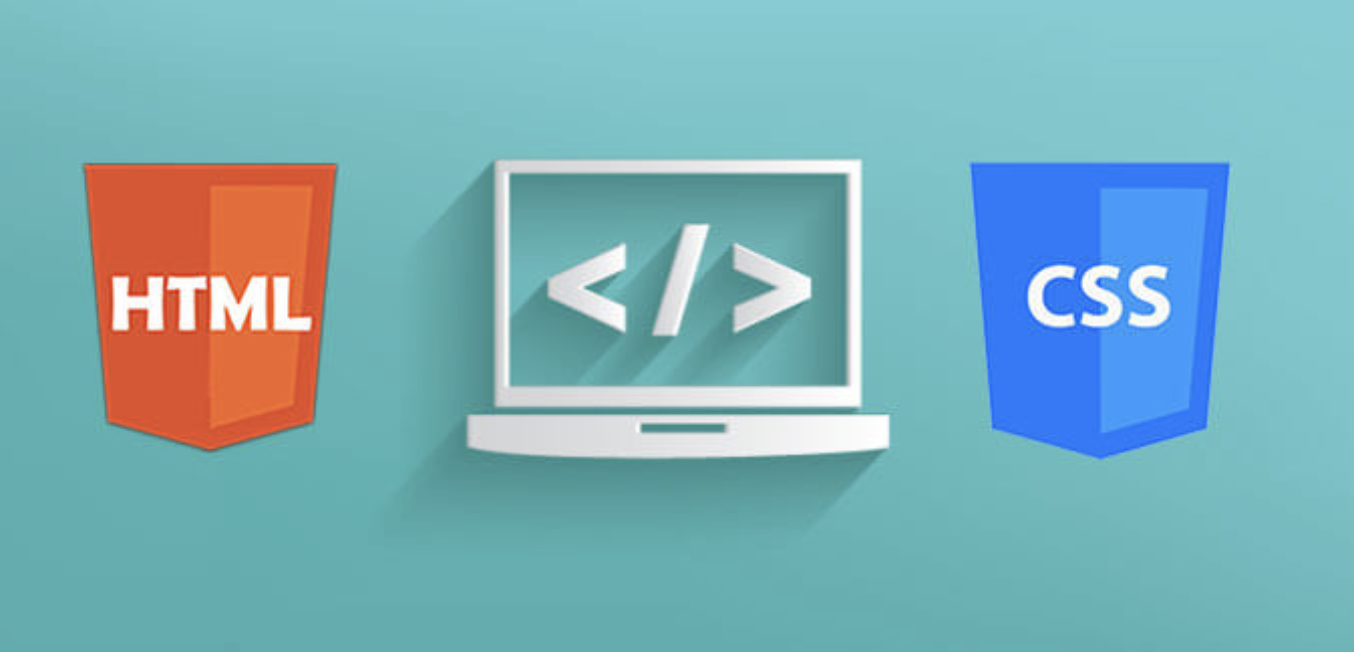
Image from codercv.com
What is HTML?
HTML stands for: Hypertext Markup Language
Hypertext - refers to links on a webpage
Markup - informs the browser how to present text
Language - set of rules so others can understand
Why do we use HTML?
HTML allows us to tell the browser important information about our content.
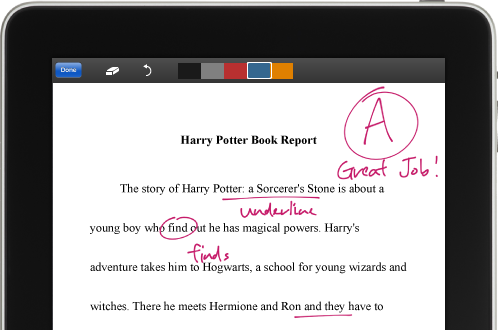
Image from Markup by ShowMe
How to Write HTML
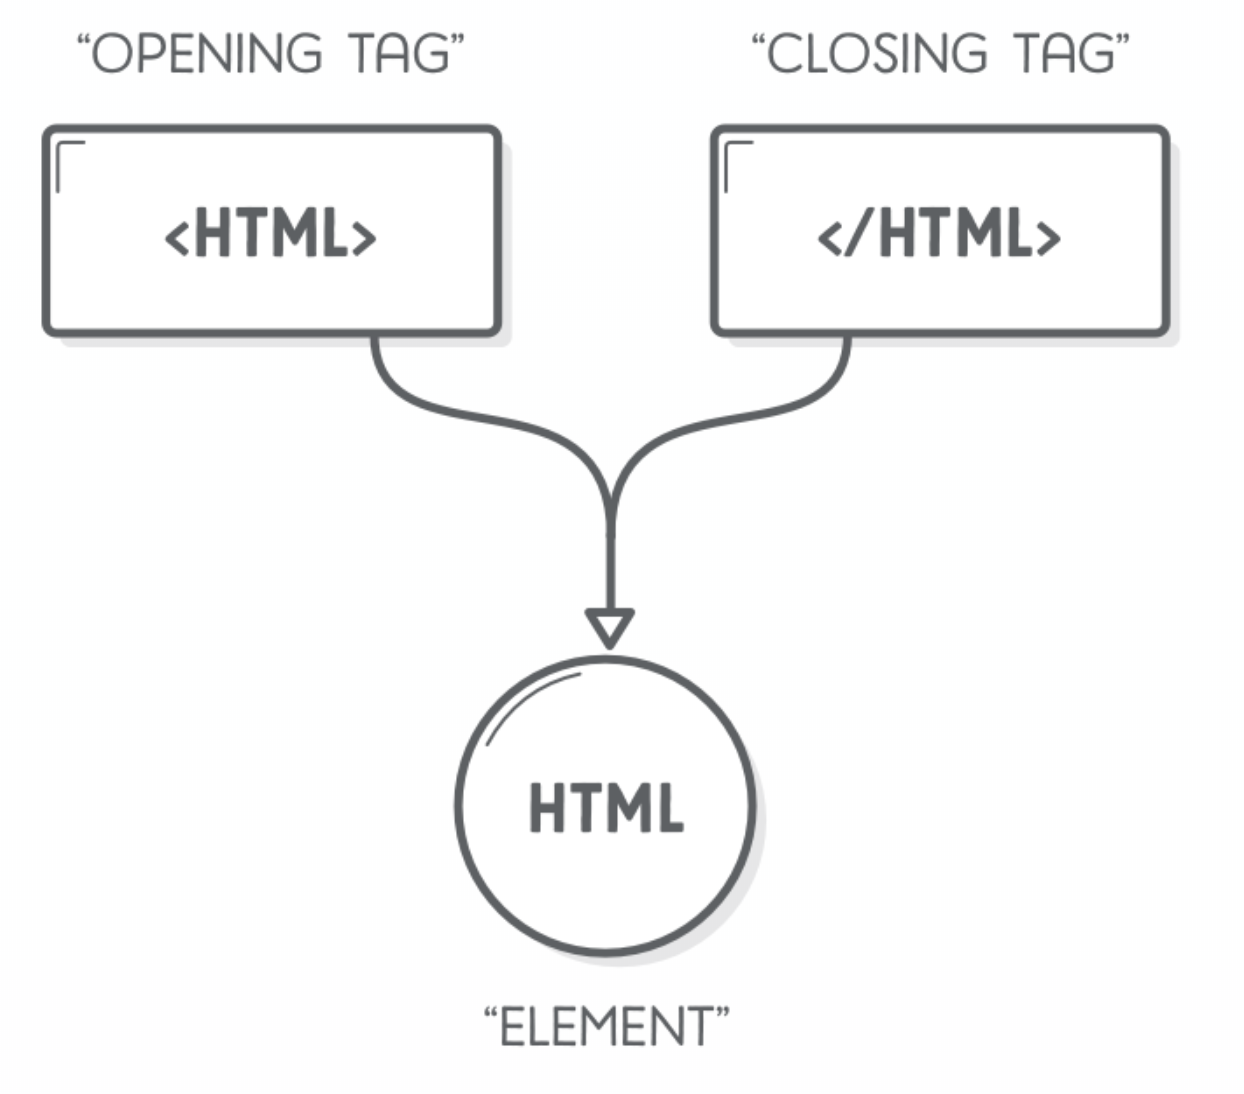
Image from internetingishard.com
Let's Write Some HTML!
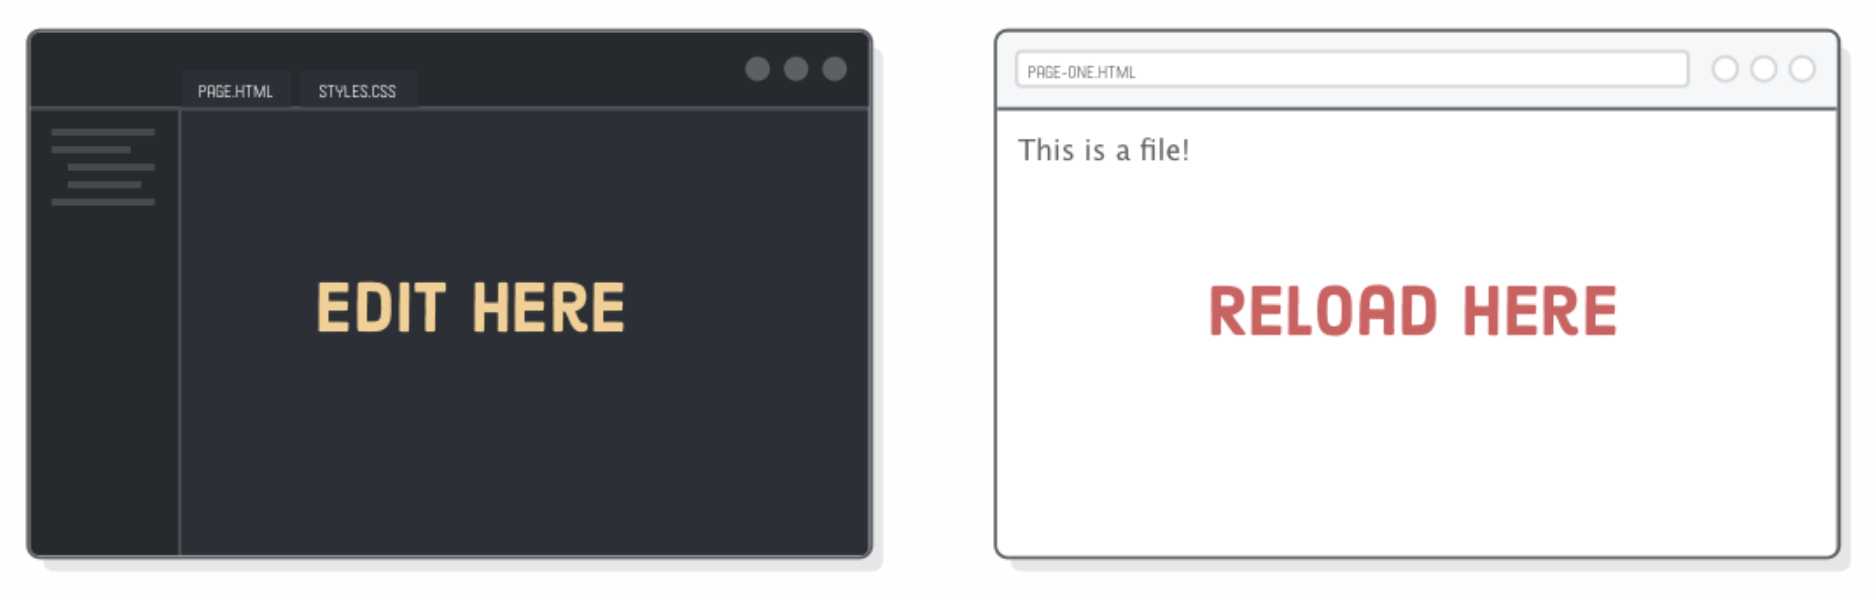
Image from internetingishard.com
Install Chrome and Atom
Visit https://atom.io
Open Your Text Editor (Atom)
Steps to create our first HTML file
File -> New File -> Save As -> index.html
Basic HTML Page
              <!DOCTYPE html>
              <html>
                <head>
                </head>

                <body>
                </body>
              </html>
<!DOCTYPE html>
              <!DOCTYPE html>
              <html>
                <head>
                </head>

                <body>
                </body>
              </html>
This line tells our browser which version of markup language to use. In this class, we are using HTML5.
<html></html>
              <!DOCTYPE html>
              <html>
                <head>
                </head>

                <body>
                </body>
              </html>
After the <!DOCTYPE html> the <html> tag is used to define the beginning and end of our HTML file. Everything we write will live between these two tags.
<head></head>
              <!DOCTYPE html>
              <html>
                <head>
                </head>

                <body>
                </body>
              </html>
The head contains information that is for the browser. This information is not visible to the user.
<body></body>
              <!DOCTYPE html>
              <html>
                <head>
                </head>

                <body>
                </body>
              </html>
The body contains the content we want the user to see. Everything in the body is visible to the user.
Let's Code
              <!DOCTYPE html>
              <html>
                <head>
                </head>

                <body>
                </body>
              </html>
View your website in a browser
Open Chrome
File -> Open File -> index.html -> Open
So... where is it?

<p> is for Paragraph
Paragraphs help us format our content in a readable fashion.
<p> is for Paragraph
Let's add a paragraph to our website.
<p>This is a paragraph</p>
<h> is for Heading
There are 6 heading tags that we can use. The number next to each heading tags indicates it's importance.
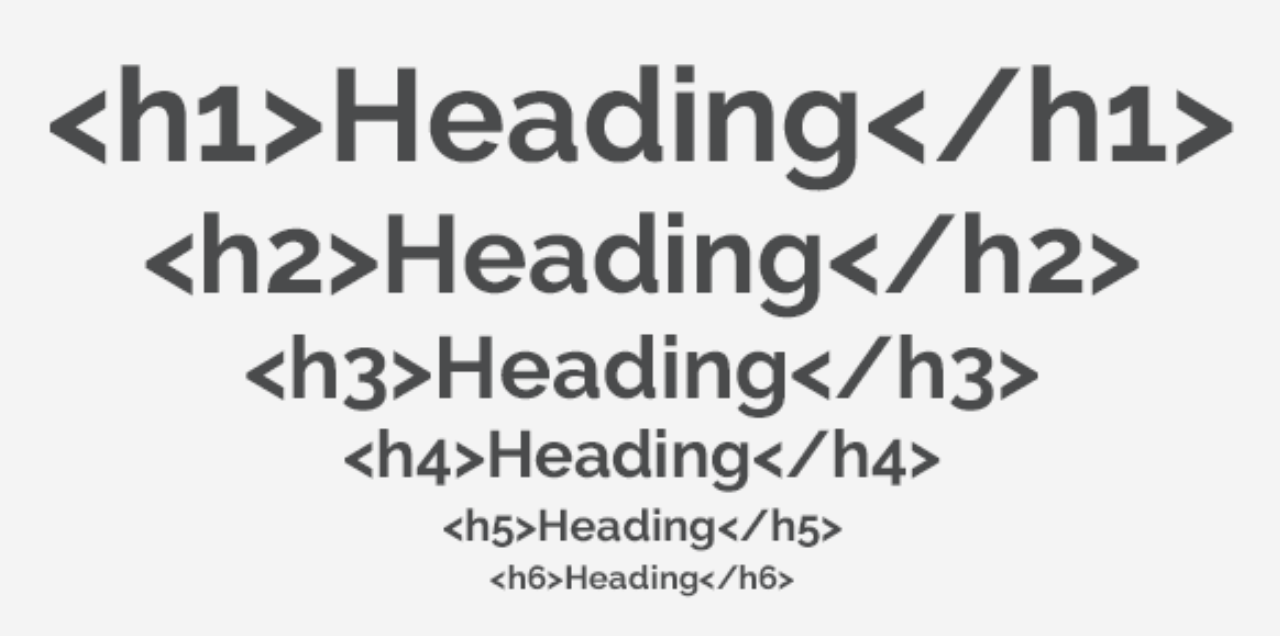
<h> is for Heading
Let's add each heading to our page.
              Heading 1
              Heading 2
              Heading 3
              Heading 4
              Heading 5
              Heading 6
<em> is for Emphasis
Empahsis makes the word italicized.
Let's add a paragraph and add <em></em> tags to one word.
<p>This <em>word</em> has emphasis.</p>
Nesting HTML Tags
All elements "nest" inside one another.
Nesting is when you place HTML tags inside other HTML tags. It's important that whichever tag opens first closes last.

<strong> is for the Bold
Strong makes the word bold.
Let's add a paragraph and add <strong></strong> tags to one word.
<p><strong>Bold</strong> and daring.</p>
<a> is for Adventure!
Okay, I made that one up...
'a' is for Anchor ⚓
But links do help us venture to other websites.
Example of an HTML link:
Google
<a> is for Anchor! ⚓
Let's add a link to our page.
Boston
<img> is for Image!
The image tag is used to add images to our site.
Supported image formats include:
- jpeg/jpg
- png
- gif
- svg
<img> is for Image!
The image tag is a "self-closing" element.
Example image tag:

<img> is for Image!
Let's add an image to our page.

Image from Unsplash
Clickable Image
To turn an image into a link,
we'll use nesting to place our
image inside a link tag.
<br> is for Line Break
The line break tag creates a line break in text.
Line breaks are useful when writing an address or poem.
                Roxbury Innovation Center

                2300 Washington St

                Boston, MA 02119
<br> is for Line Break
Roxbury Innovation Center
2300 Washington St
Boston, MA 02119
Lists
Lists can be used to organize any lists of items.
Image from Girl Develop It course
<ol> is for Ordered List
Creates a list of items, shown as a numbered list.
- First item
- Second item
- Third item
<ol> is for Ordered List
Let's add an ordered list to our page.
- List item one
- List item two
<ul> is for Unordered List
Creates a list of items, shown as a bullet-point list.
- First item
- Second item
- Third item
<ul> is for Unordered List
Let's add an unordered list to our page.
- List item one
- List item two
Coming up next class...
Styling our web page with CSS